-Windowed Text Design-
You should be able to do these things during this project:
1. Create a 3 X 3 canvas
2. Apply a color (black/white) to a background using a shape.
3. Create text.
4. Change the font style and size using the section tool.
5. Use the selection tool to arrange text.
6. Rotate text with the selection tool.
7. Add a stroke to the background shape to create a border.
The folowing will be taught at the end of the project:
8. Add a rectangle with no fill and a 5px stroke.
9. Select all the layers in that 3x3, right click and choose "Create a Clipping Mask".
10. Use the Direct Selection Tool to move interior shapes around.
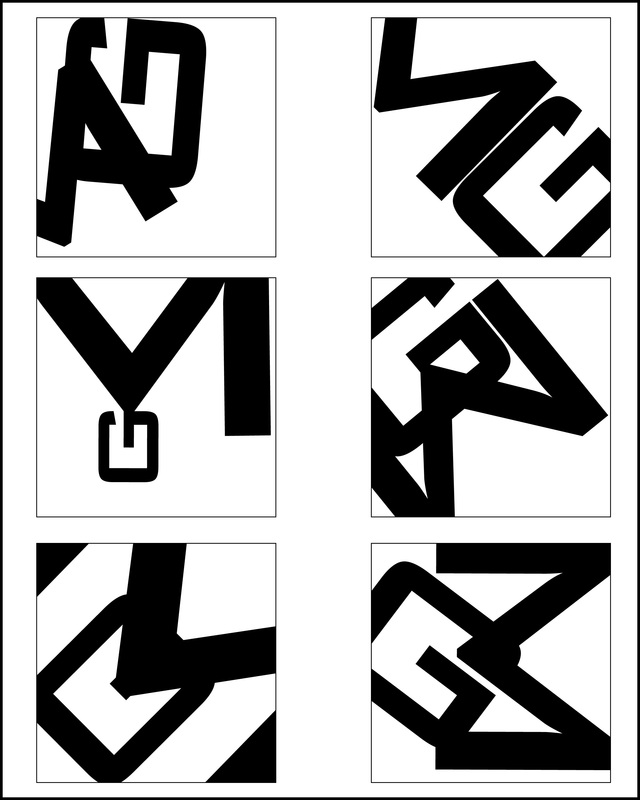
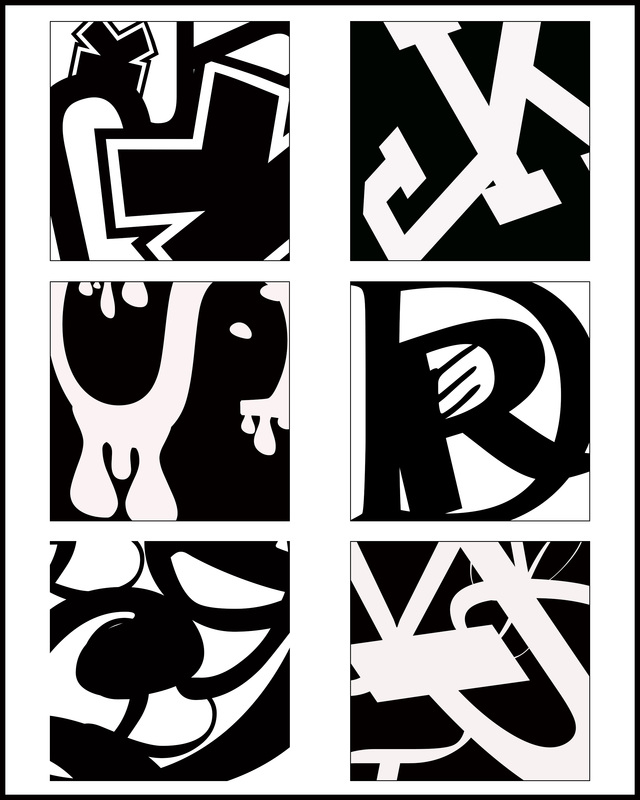
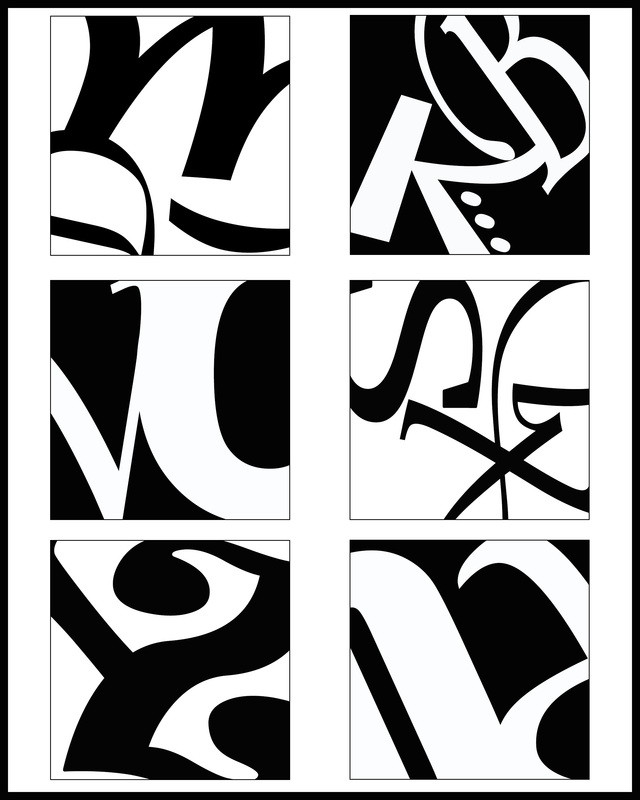
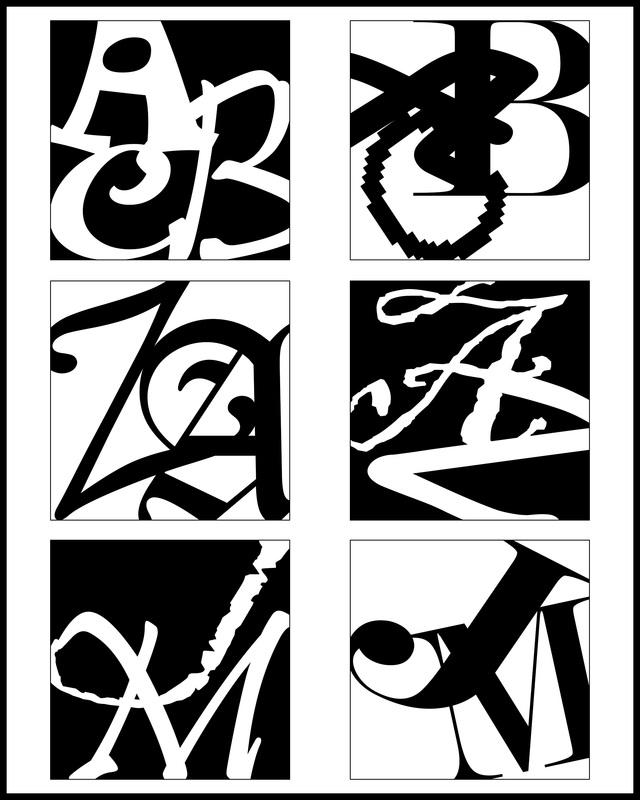
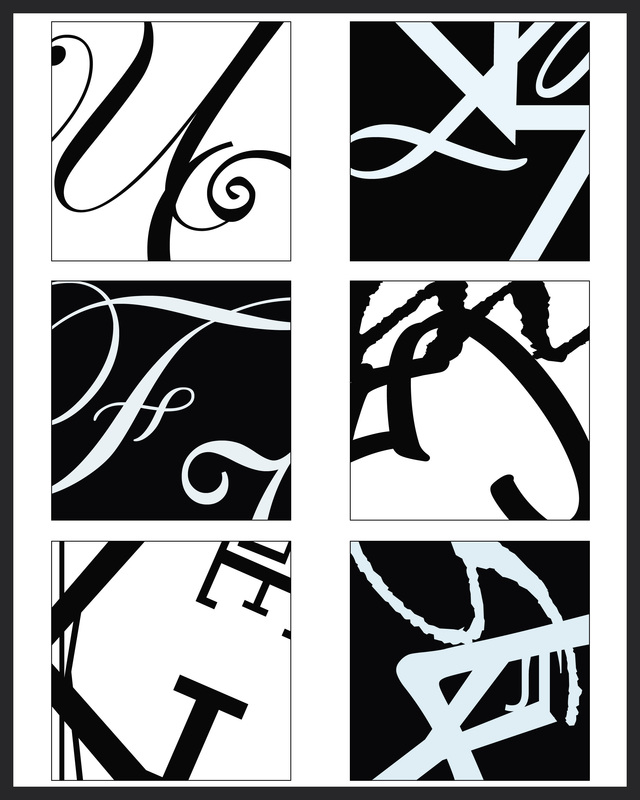
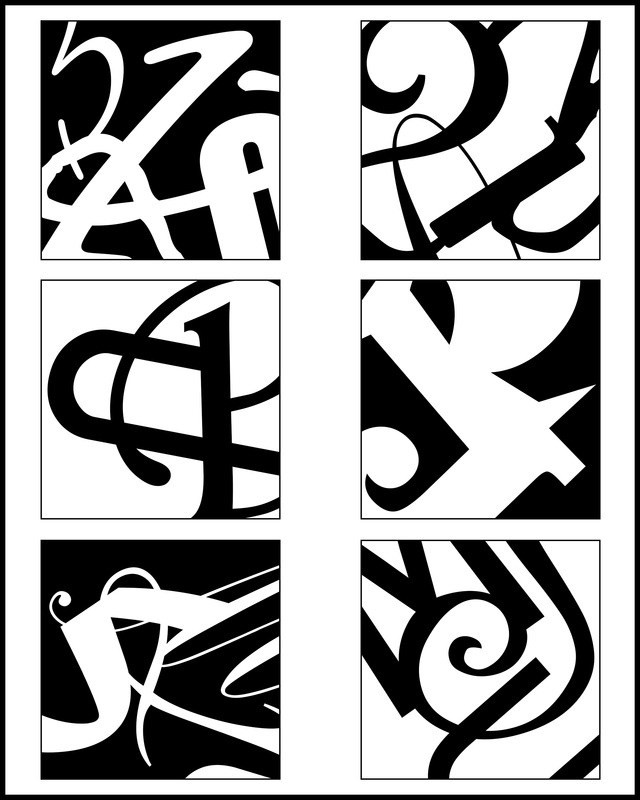
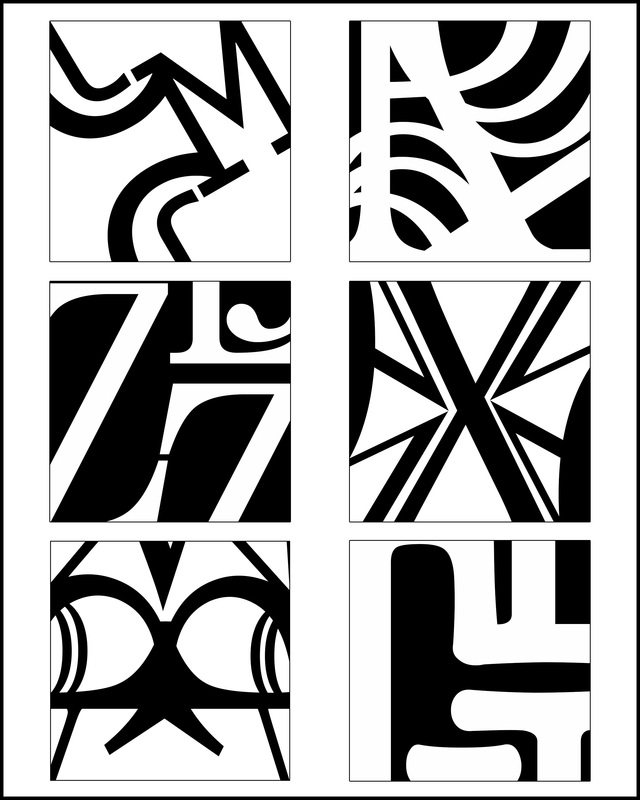
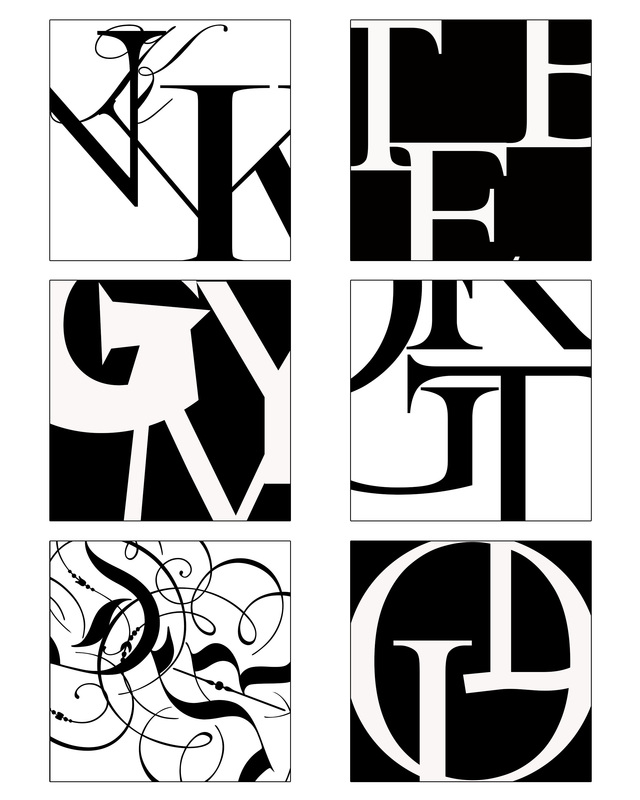
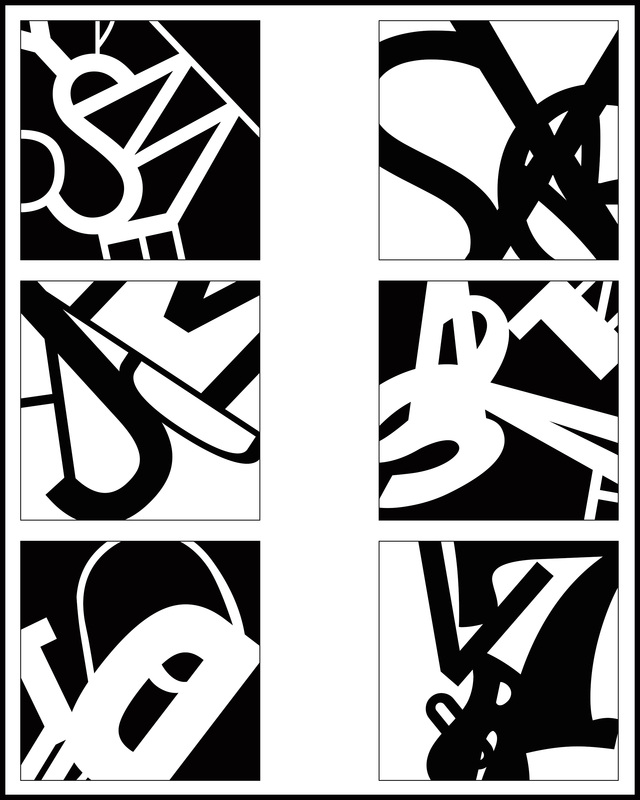
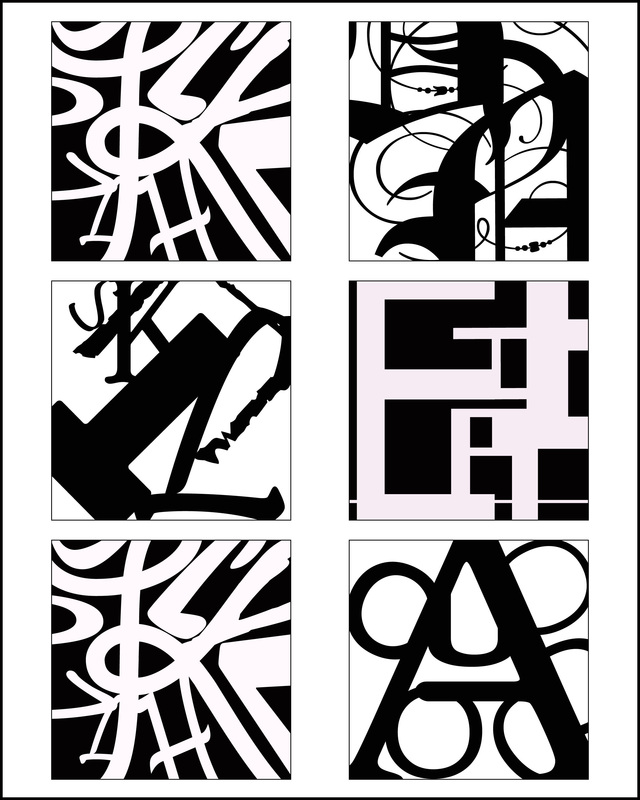
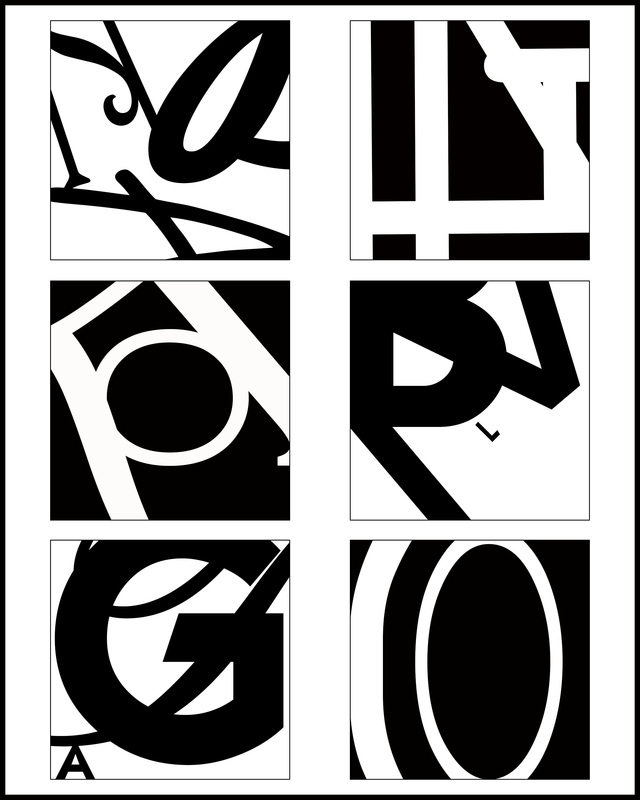
Student Examples

Example 3" X 3" Tile
|
1
|
2
|
3
|
4
|
5
|
6
|
7
|
8
|
9
|
10
|
11
|
References:
Here are the spec's and tutorials for the "Windowed Text Design"
Video Tutorial: Computer Graphic Design: 6-0,6-1 Text Window
Positive and negative space is created when adjacent light and dark areas meet. This creates contrast and emphasis in a design. We are going to do study in positive and negative space using text on a small canvas. Pay attention to not only the positive space created but also the negative space, without it the design would be bland and virtually impossible to decipher.
Specifications:
1. 3 X 3 RGB 300 Res. canvas
2. Must use at least two characters in each design but no more than 4-5. We want to make our text big and go beyond the bounds of the canvas. The text in this project does not need to be recognizable as a letter or number, rather as a shape...
3. Each character can be the same font in any particular tile. However you may not use the same font through out every tile, you must a variety of different fonts and sizes.
4. Three designs must use a black background and the other three must use white as the background.
5. All six designs must be formatted correctly on an 8 X 10 RGB 300 Resolution canvas with a border.
Example 3" X 3" Tile
Formating Directions!!!!!
1. Select all layers in the Layer Box so they are all highlighted, do this by:
-Holding down the CTRL button and clicking on the other layers in the layer box so they are all
highlighted at once
-Press CTRL+E, this will merge all layers together
-Now double-click on the merged "background" layer in the layer box, a menu wil pop up which will ask you to rename. Don't rename, just leave it as "Layer 0",
now it can be moved from one canvas to another.
2. Drag each design seperatley onto an 8X10 canvas
-Click on the canvas of your design and drag up onto the tab of the new canvas.
-Continue to hold down on your left mouse button until the new canvas appears.
-Now drag your design and drop it on to the new canvas, your design will appear and a new layer will be created.
3. Add a stroke (layer style) to each of your six designs after they have been moved to the new canvas. Use these settings for the layer style stroke:
-Size: 3
-Position: Inside
-Color: Black
4. Use the Grid to line up each tile...
1. Press ctl+' to turn on the grid.
2. Turn the "snap" on by going clicking "VIEW" in the menu bar and making sure that the "SNAP" in checked.
Here are the video tutorials for the "Windowed Text Design"
Windowed Text Design Tutorial 6-0
|
Windowed Text Design Formatting Tutorial 6-1
|
Border Tutorial |
